🎥 Automated Video Analysis
This page introduces the automated video analysis in DL_Track_US.
- Videos are evaluated without user input.
- Videos must be contained in a single folder, e.g.,
DL_Track_US_example/videos.
If you have not downloaded the example folder yet, please do so:
DL_Track_US - Examples & Models.
📦 Unzip the folder and save it somewhere easily accessible.
The automated video analysis is very similar to automated image analysis:
Only a few analysis parameters differ between the two types.
After the analysis, a proc.avi file will be created in the input video directory.
It can be opened with VLC Player (Windows) or OmniPlayer (macOS).
1. Creating Video and Network Directories
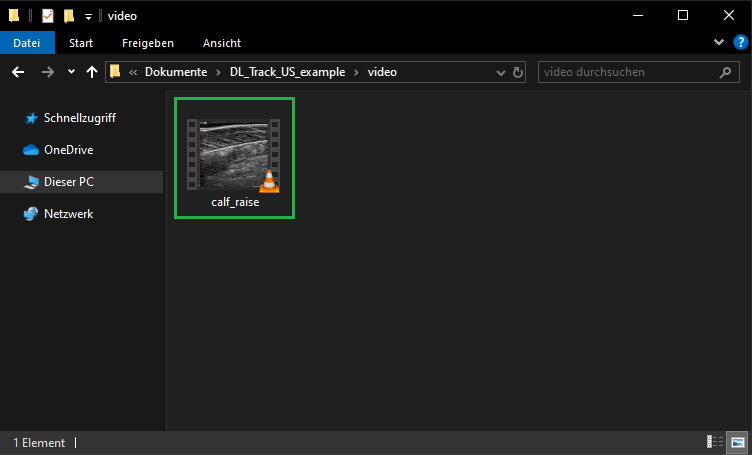
- Videos should be stored in a single folder.
- The
DL_Track_US_example/videosfolder contains one video.
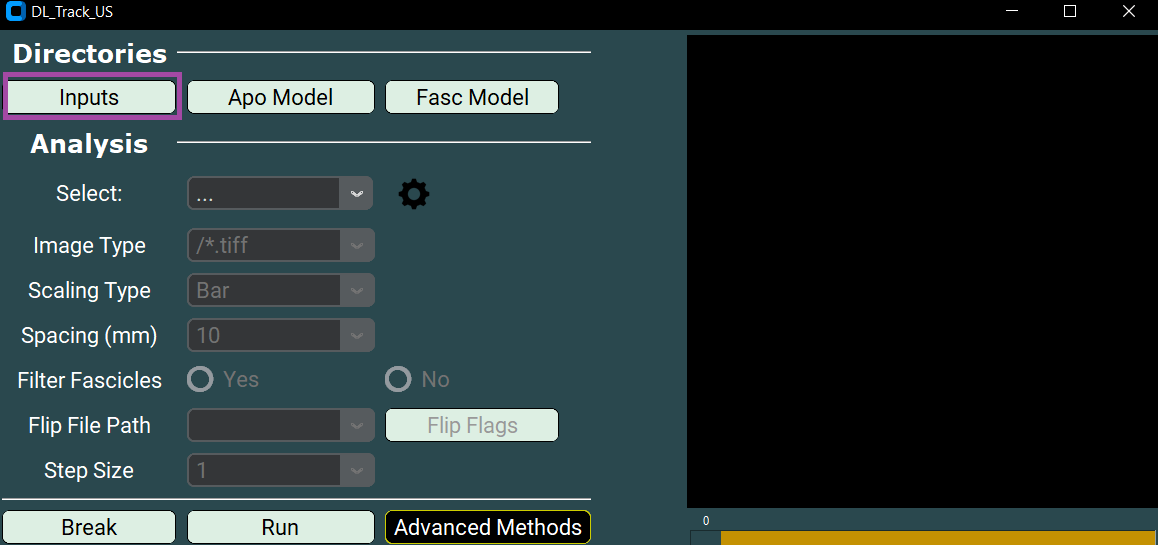
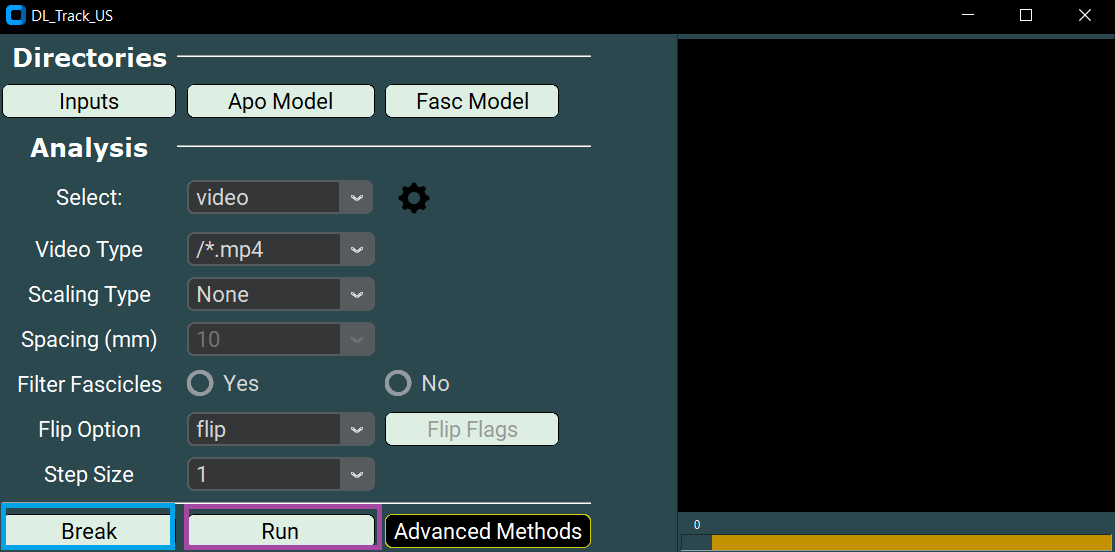
2. Specifying Input Directories in the GUI
Once the GUI is open:
- Click the Inputs button to specify the folder containing your video.
- Select the
DL_Track_US_example/videosfolder and click Select folder.
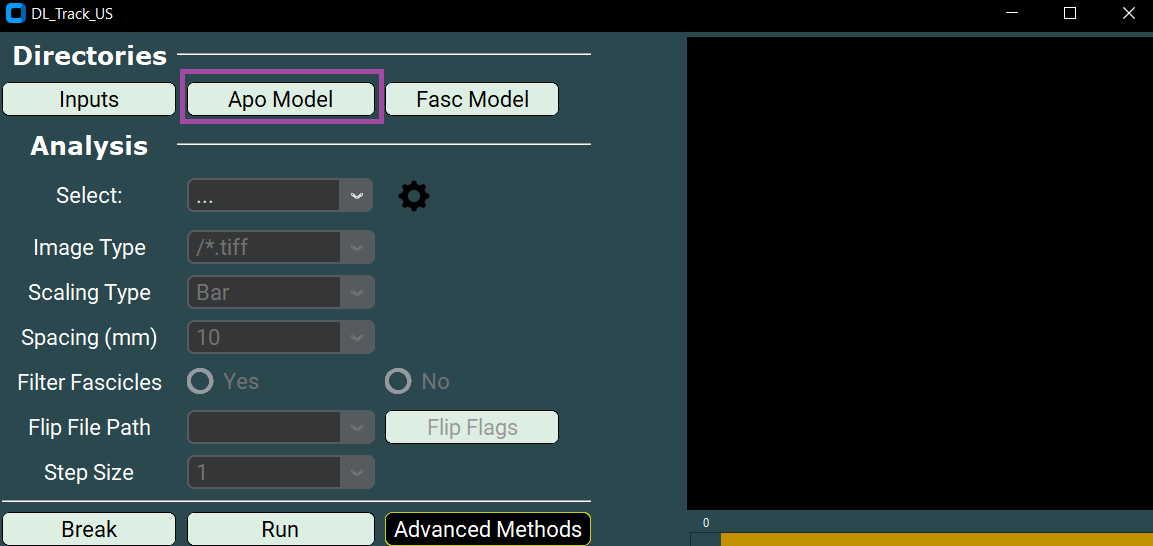
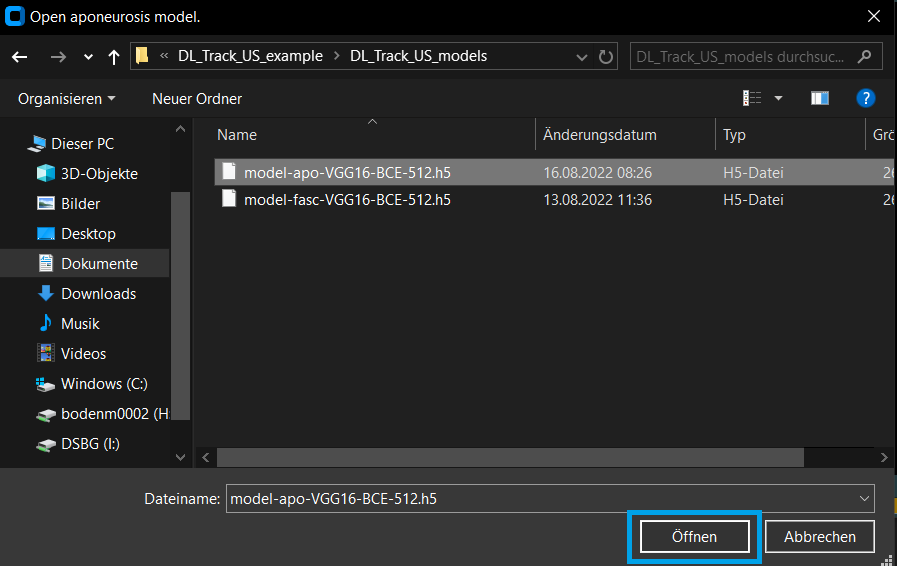
Next, specify the aponeurosis model:
- Click the Apo Model button.
- Select the aponeurosis neural network file from
DL_Track_US_v0.3.0/models. - Click Open.
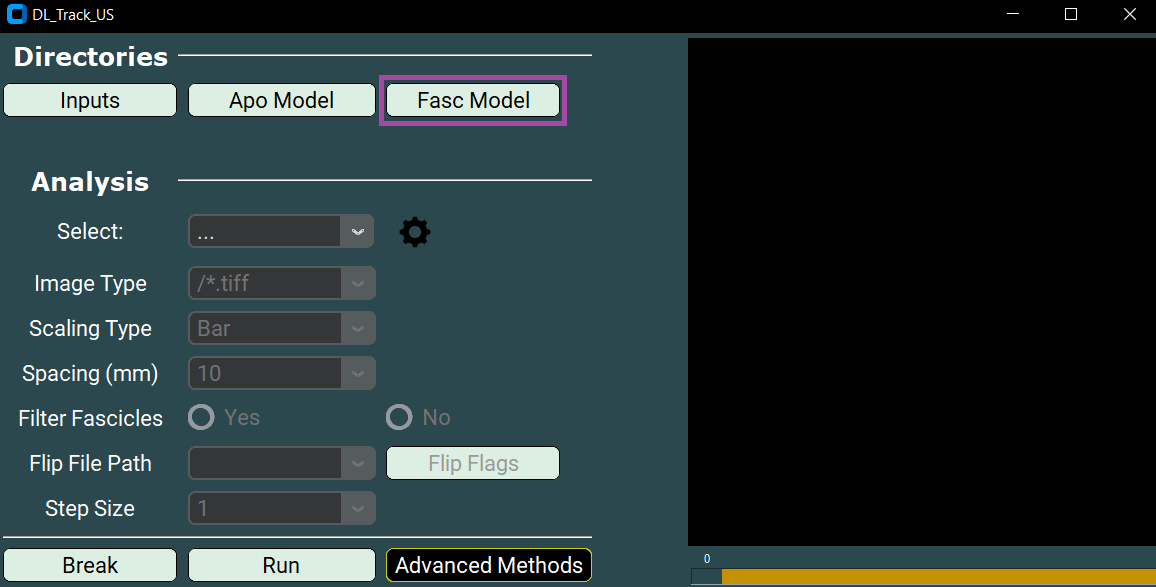
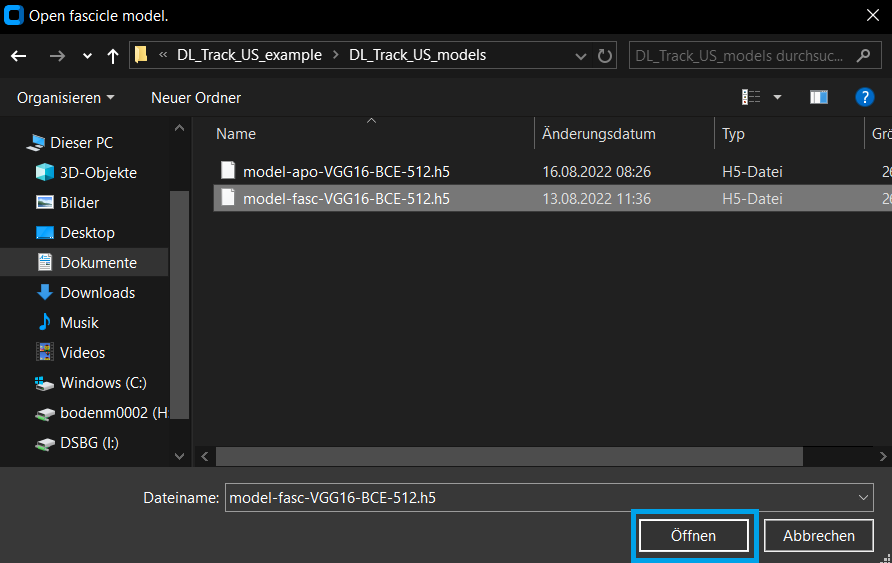
Then, specify the fascicle model:
- Click the Fasc Model button.
- Select the IFSS fascicle neural network file from
DL_Track_US_v0.3.0/models. - Click Open.
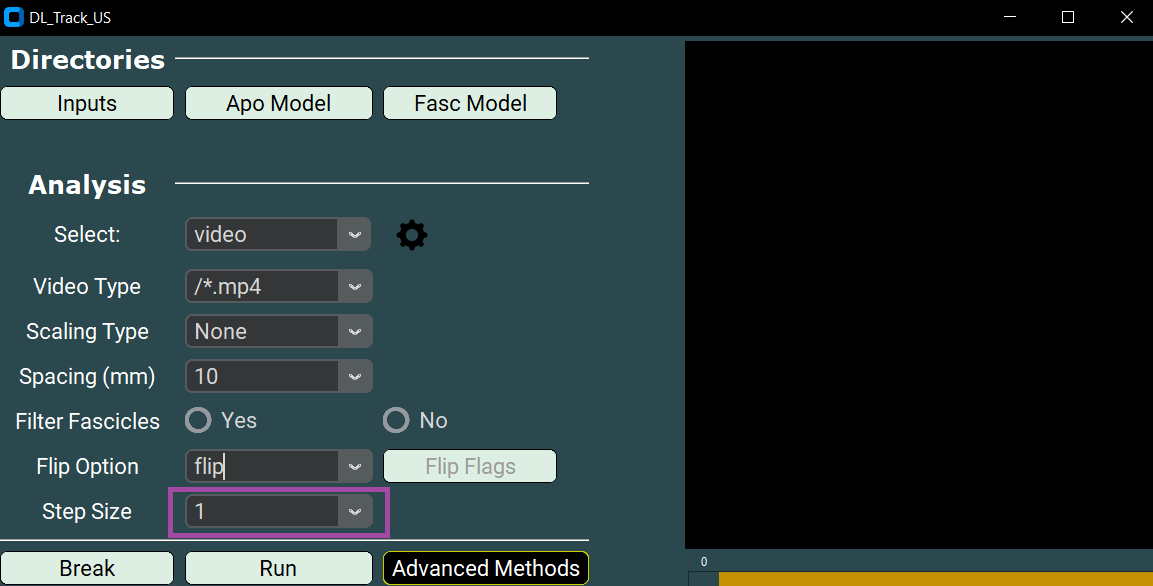
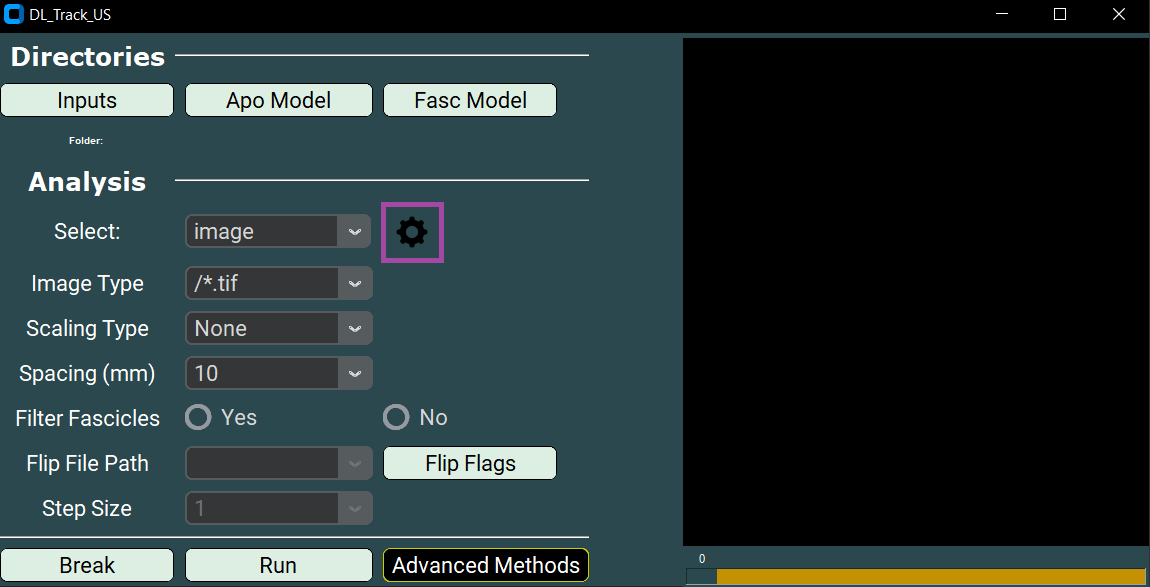
3. Specifying Analysis Parameters
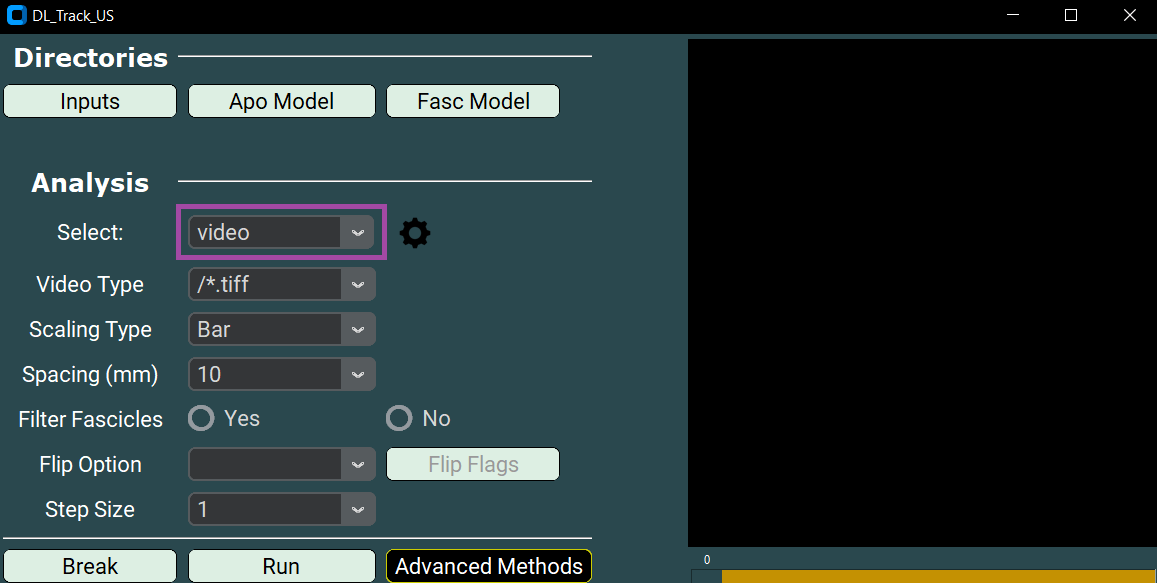
3.1 Selecting the Analysis Type
- Choose Video from the dropdown menu.
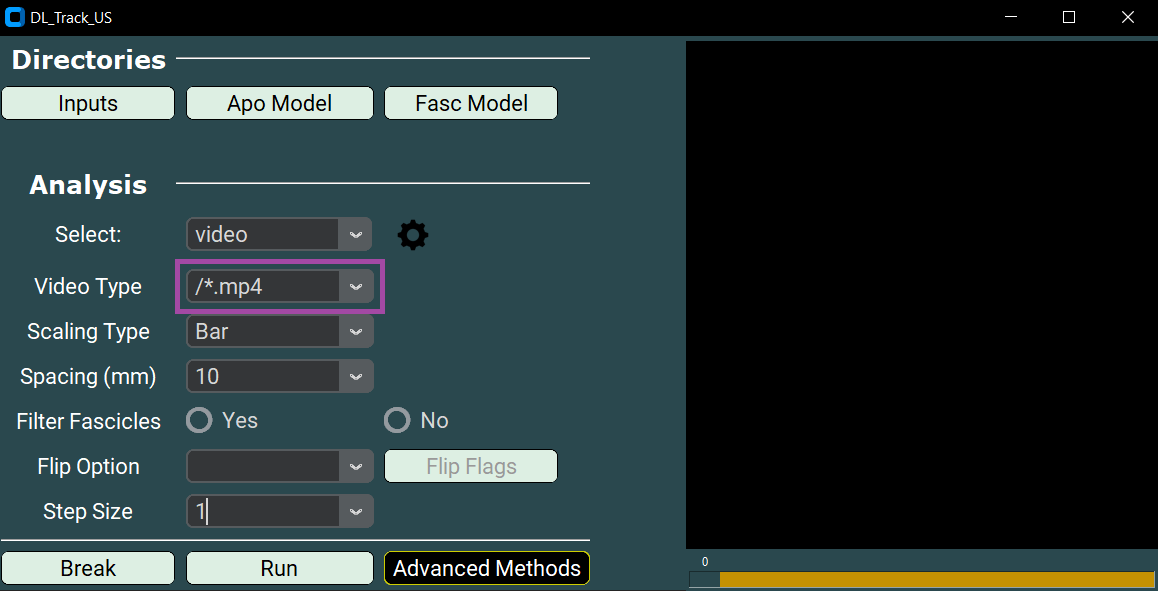
3.2 Setting the Video Type
- The file extension must match your videos (e.g.,
.mp4). - Select or type /*.mp4.
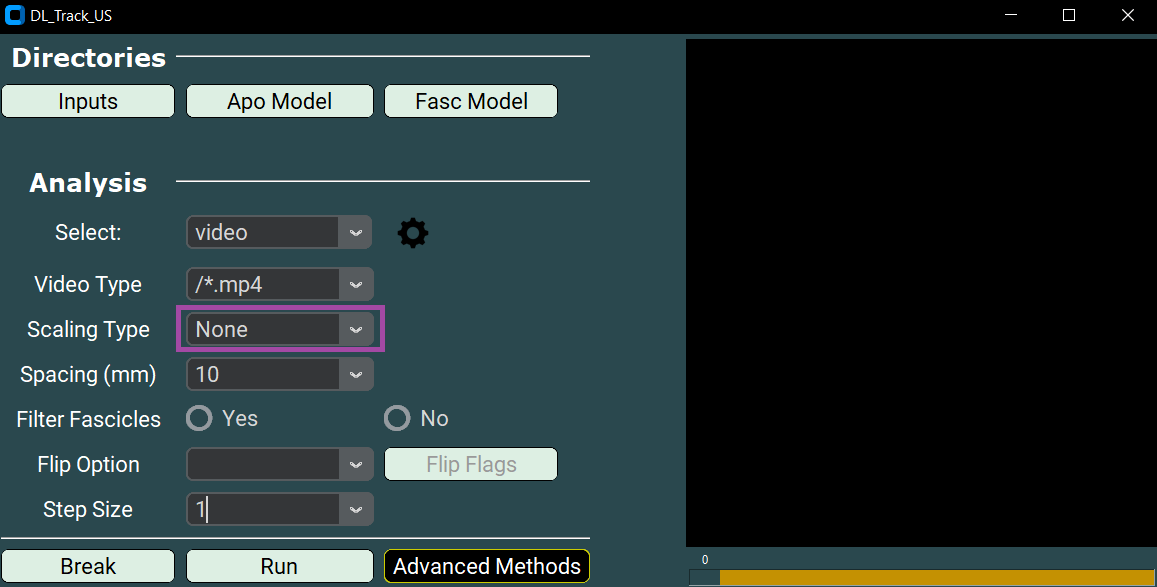
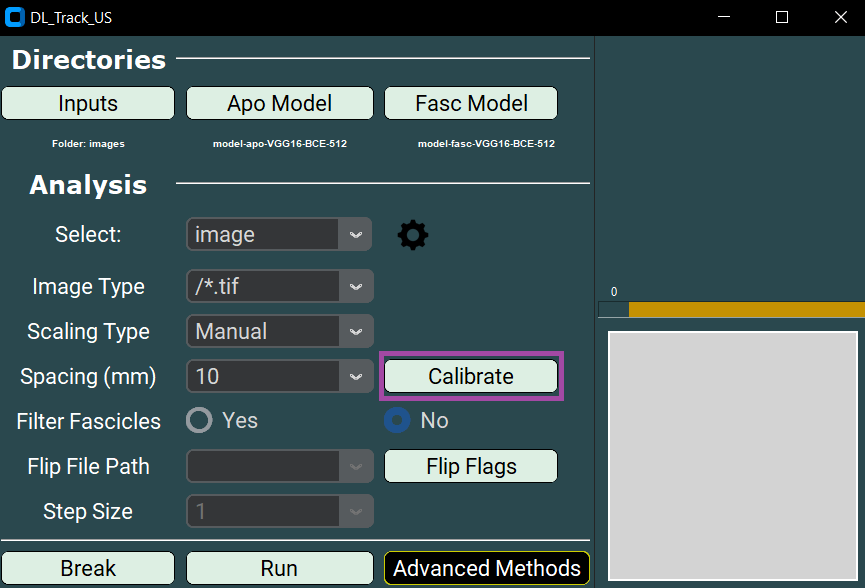
3.3 Choosing the Scaling Type
- Select None for this tutorial.
Alternatively, you could use Manual scaling:
- Place two points on a known distance (5, 10, 15, or 20 mm).
- Click Calibrate.
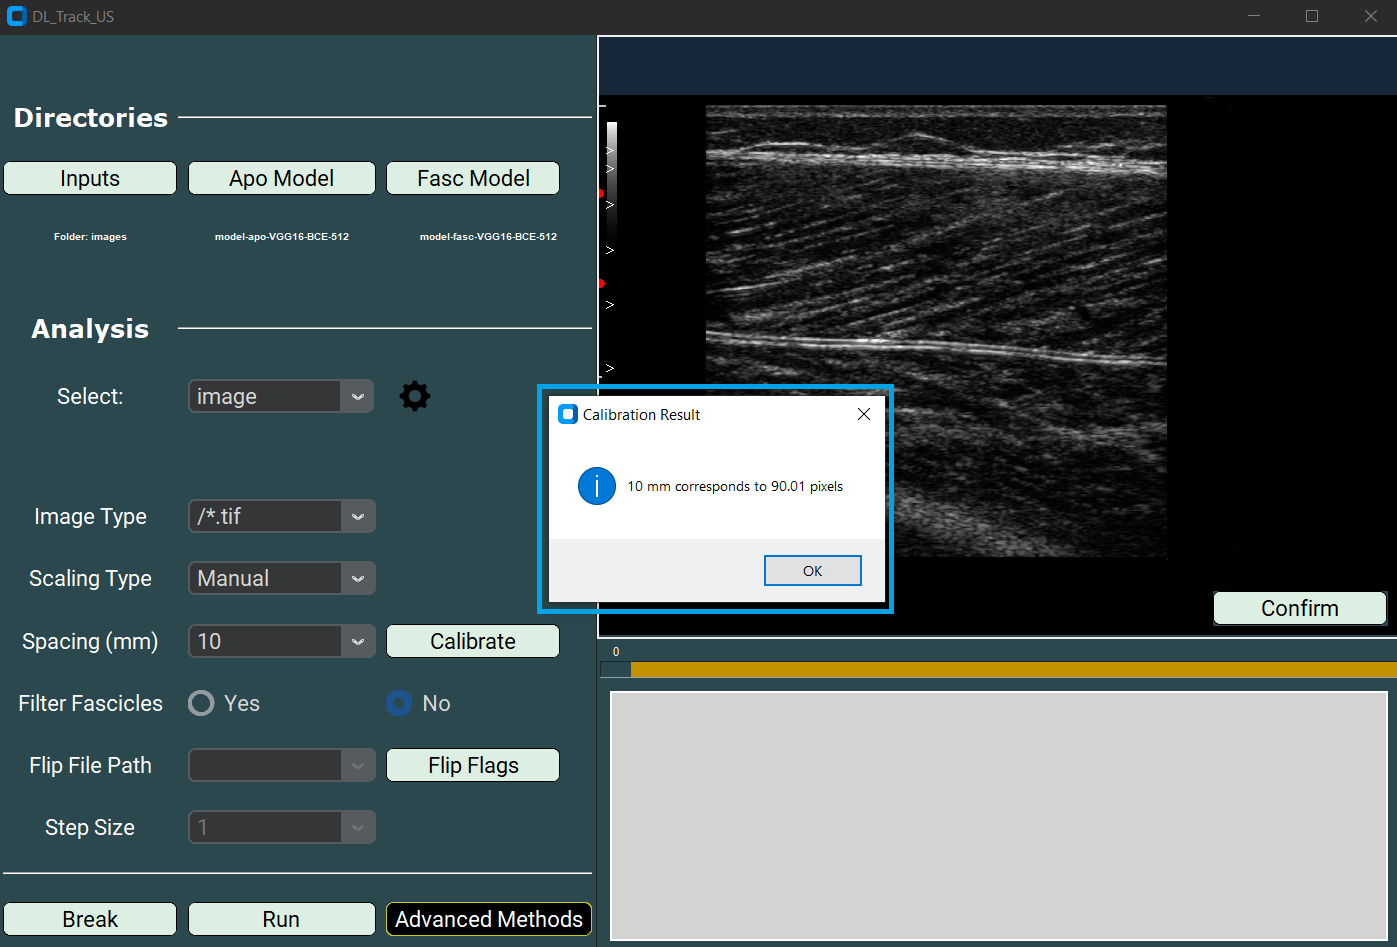
 After calibration, a messagebox shows the pixel distance:
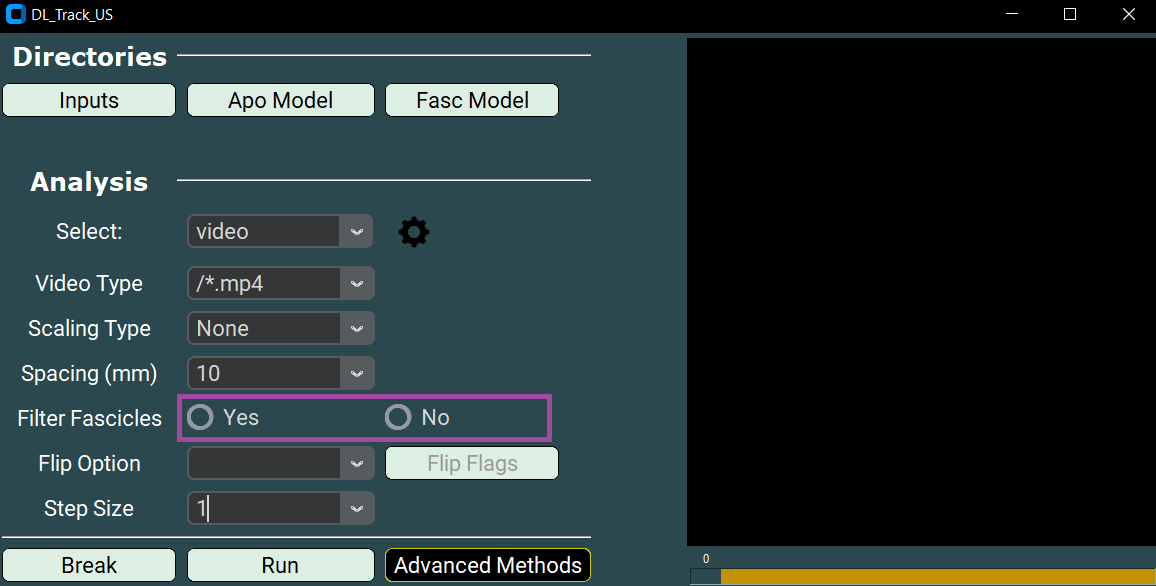
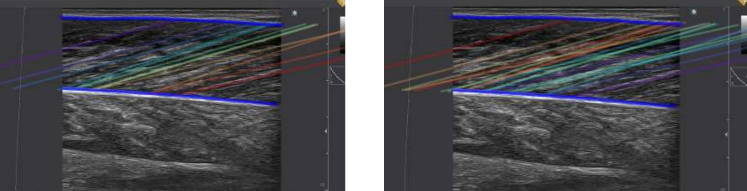
3.4 Filtering Fascicles
- Select YES to remove overlapping fascicles.
Example difference between filtered and unfiltered:
3.5 Setting Flip Options
- Choose the appropriate flip setting:
- Flip to flip the video vertically,
- Don’t Flip otherwise.

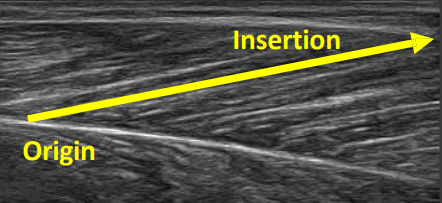
For the example video, flipping is required to correct fascicle orientation.
3.6 Setting Frame Steps
- Set Frame Step to 1 (every frame analyzed).
- Larger steps (e.g., 3, 10) reduce computation time but skip frames.
4. Adjusting Settings
Open the settings by clicking the Settings Wheel.
- A txt script
settings.txtopens in your default editor. - Default values are listed.
- Make sure that "segmentation_mode" is set to "stacked".
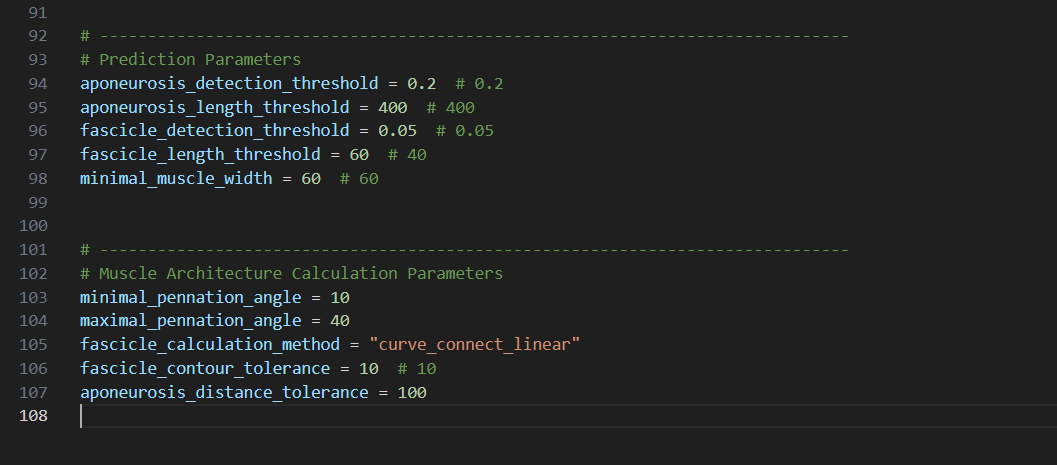
You can find an explanation on all setting in this chapter.
💡 Tip:
Adapt these parameters according to your images or videos!
Correct parameter settings can greatly impact your analysis results.For future analyses, always test parameter settings on a small sample of your data first. Especially, choose a pennation angle range that is physiologically plausible with a minimum range.
If you accidentally disrupt the
settings.txtfile, there is a backup available:_backup_settings.py(only when downloading the repository).
5. Running / Breaking DL_Track_US
- Click the Run button to start analysis.
- Use the Break button if you need to stop the analysis.
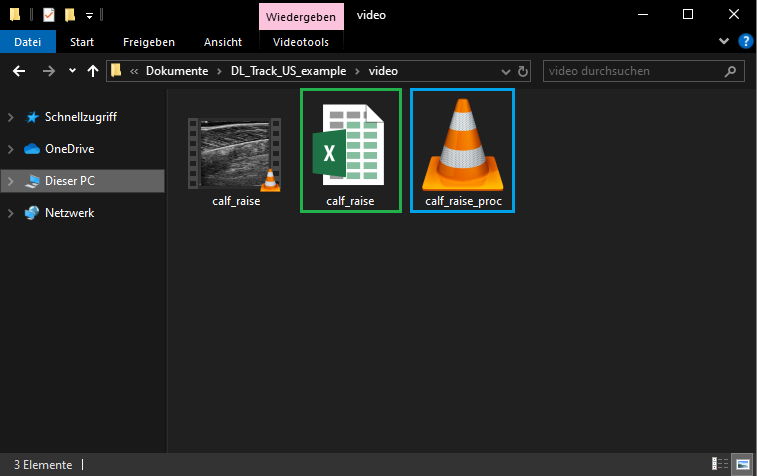
Once analysis completes, navigate back to DL_Track_US_example/videos.
You will find two new files:
- calf_raise_proc.avi:
-
Video showing overlaid segmentation results.
-
calf_raise.xlsx:
- Excel file containing estimated muscle parameters (fascicle length, pennation angle, muscle thickness).
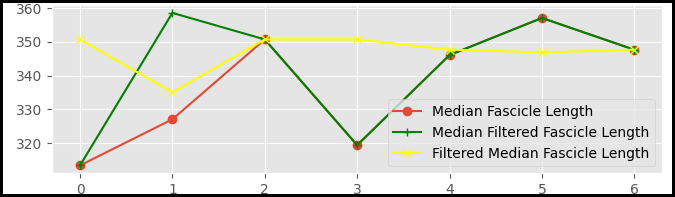
Line graph results include:
- Median Fascicle Length
- Median Filtered Fascicle Length
- Filtered Median Fascicle Length (based on chosen filter)
6. Error Handling
If an error occurs:
- A messagebox will open to explain the issue.
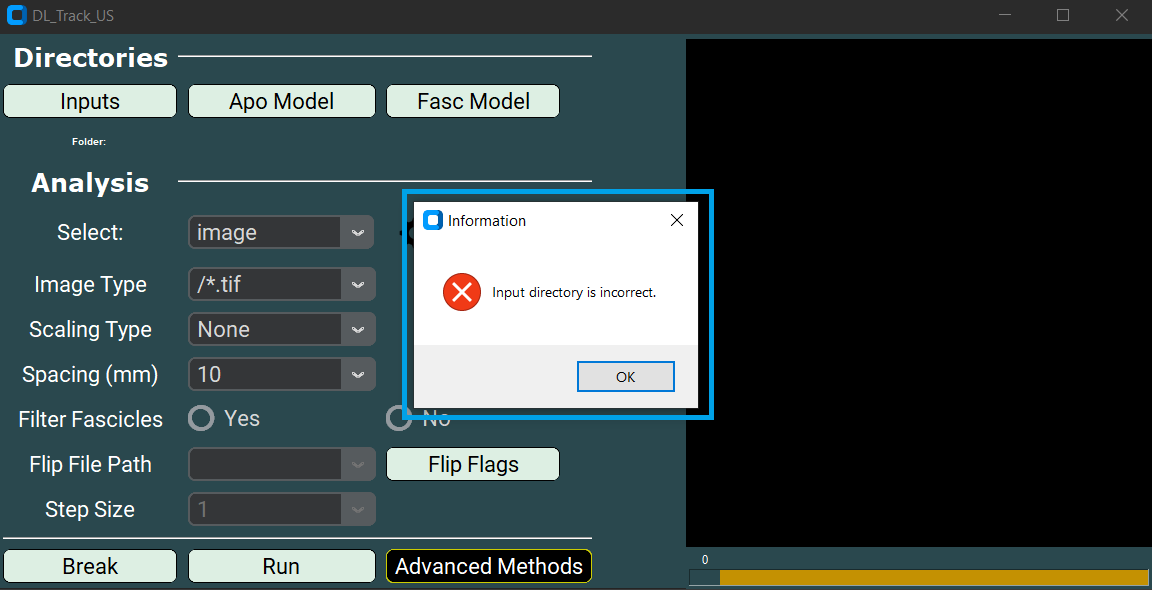
We have tried to make all error messages as concise and informative as possible.
Simply follow the instructions in the error box and restart the analysis after resolving the issue.
⚠️ Note:
If an unexpected error occurs that is not caught by a message box,
please report it in the DL_Track_US Discussion Forum - Q&A Section.
When reporting an issue:
- Please include a description of the problem,
- Steps to reproduce the issue,
- And (if possible) screenshots of the GUI and error message.
By following these guidelines, we can continuously improve DL_Track_US.