🧪 Testing Manual Image / Video Analysis
This page explains how to test the manual image and manual video analysis modes.
- For this test, single images (not videos) are a prerequisite.
- The test image you must use is located in the
DL_Track_US_example/tests/test_images_manualfolder. - Both manual image analysis and manual video analysis use the same Python class (
ManualAnalysislocated inmanual_tracing.py). - Therefore, testing one (manual image analysis) is sufficient.
Test Preparation
Before starting:
- Make sure to use the correct image:
DL_Track_US_example/tests/test_image_manual. - Click the Run button to start the analysis.
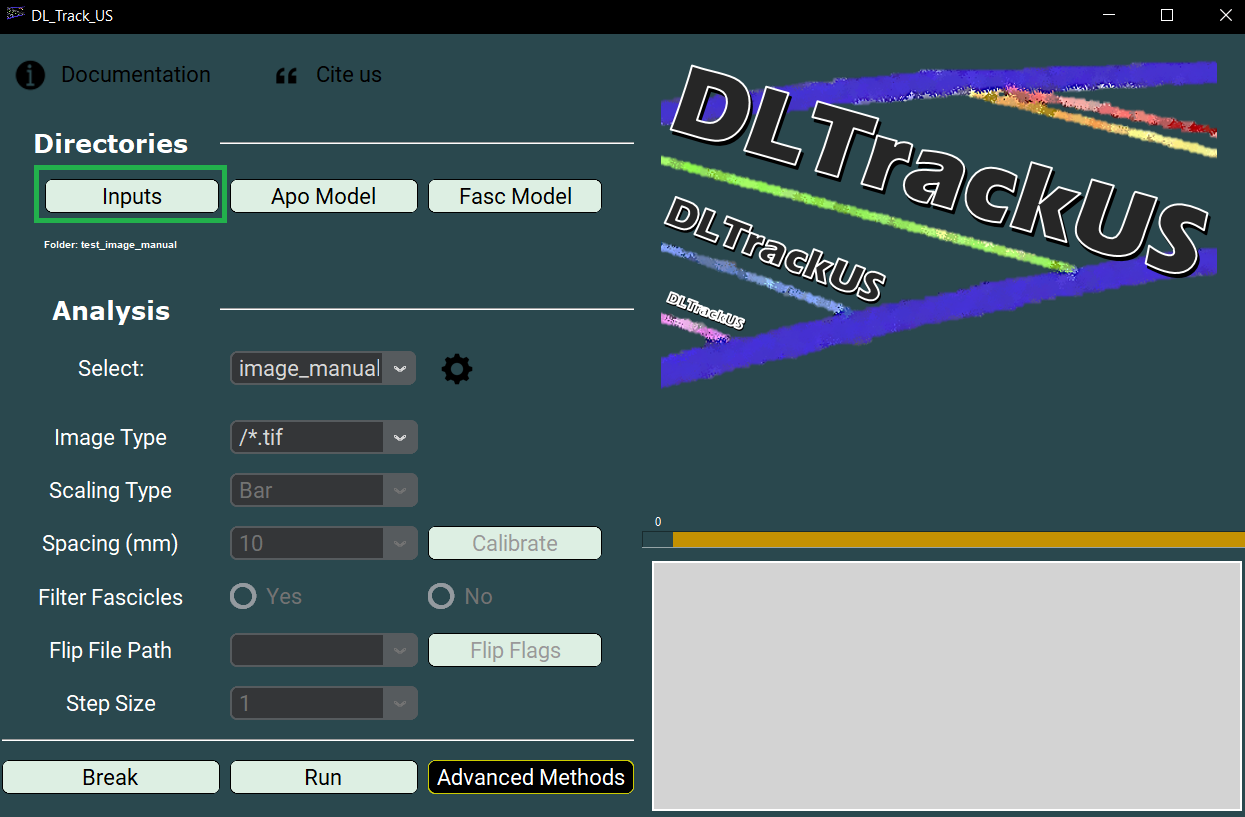
Running the Test
After clicking Run:
- The Manual Analysis window should pop up containing the test image.
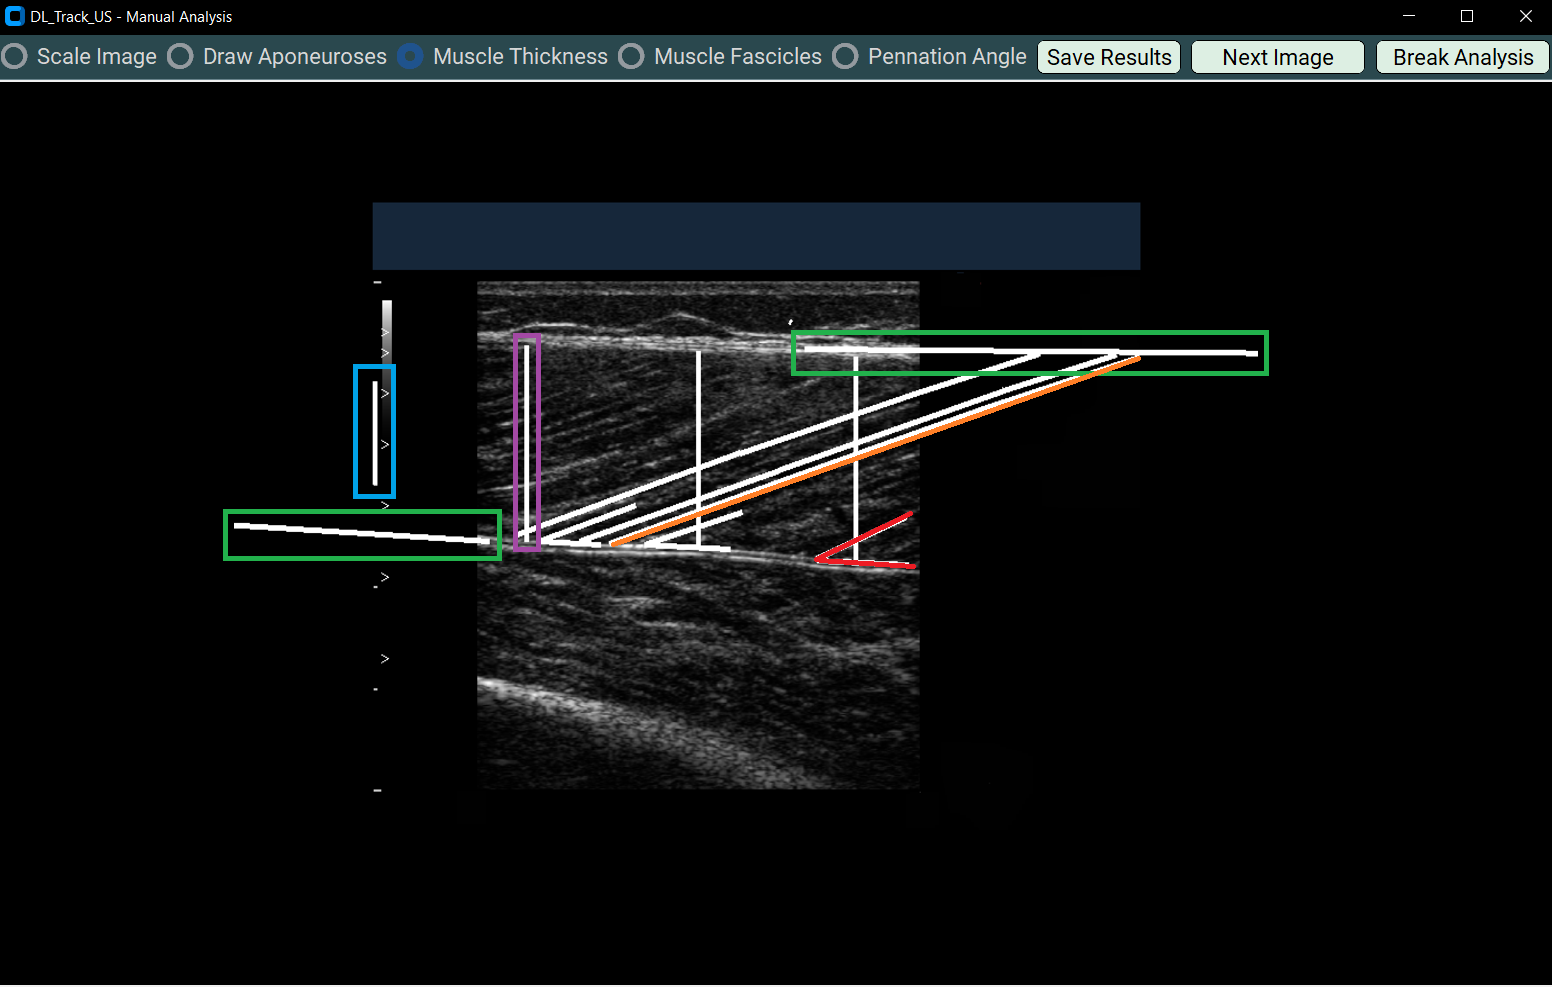
Reanalysing the Test Image
Follow these steps:
- Scale the image
- Follow the one-centimetre long scaling line shown on the left of the image.
-
Scale the image accordingly.
-
Draw Aponeuroses
-
Redraw the superficial and deep aponeurosis extension lines.
-
Measure Muscle Thickness
-
Redraw the three vertical muscle thickness lines using one segment each.
-
Trace Fascicles
-
Redraw the three diagonal fascicle lines using three segments each.
-
Measure Pennation Angles
- Redraw the three pennation angles using two segments each.
⚡ Important:
Always select the correct Radiobutton corresponding to the parameter you are analyzing.
After reanalyzing all lines:
- Click the Save Results button to save your analysis.
A new file will be created:
Manual_Results.xlsxinside theDL_Track_US_example/tests/test_image_manualfolder.
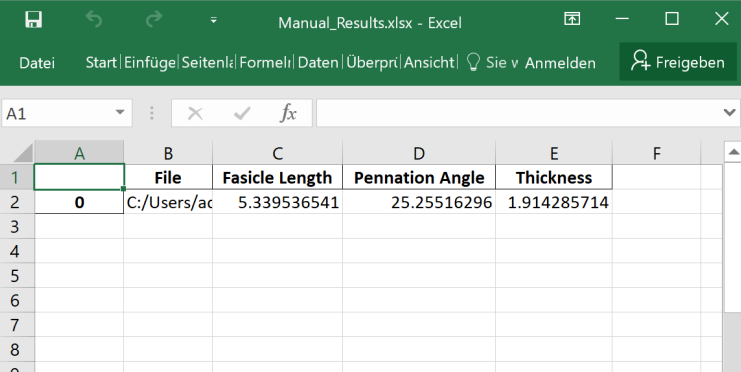
Validating the Results
- Open the newly created
Manual_Results.xlsxfile. - Compare the analysis results to the expected results shown below.
If the results are similar, DL_Track_US works properly for manual image and video analysis!